Your First Event
Create a Snaps Event to:

Invite people to your event
Let attendees and others view and share photos and videos
Describe and promote your event
Inform about your event
In addition to posting photos and videos, event owners can set:
Title
Description
Date / Time Range
Location
Contact Information (phone number and email)
Additional Instructions
Links
Event owners have control over what different types of users can see and do in the context of their events. See "Access Settings" and "Visibility Settings" for full details.
Creating Your First Event
Create an account, or sign in if you already have a Snaps account. Snaps uses one time passwords, which are sent to your email address whenever you create an account or try to sign in.
Once you're signed in, click "Create Event" on the home screen.
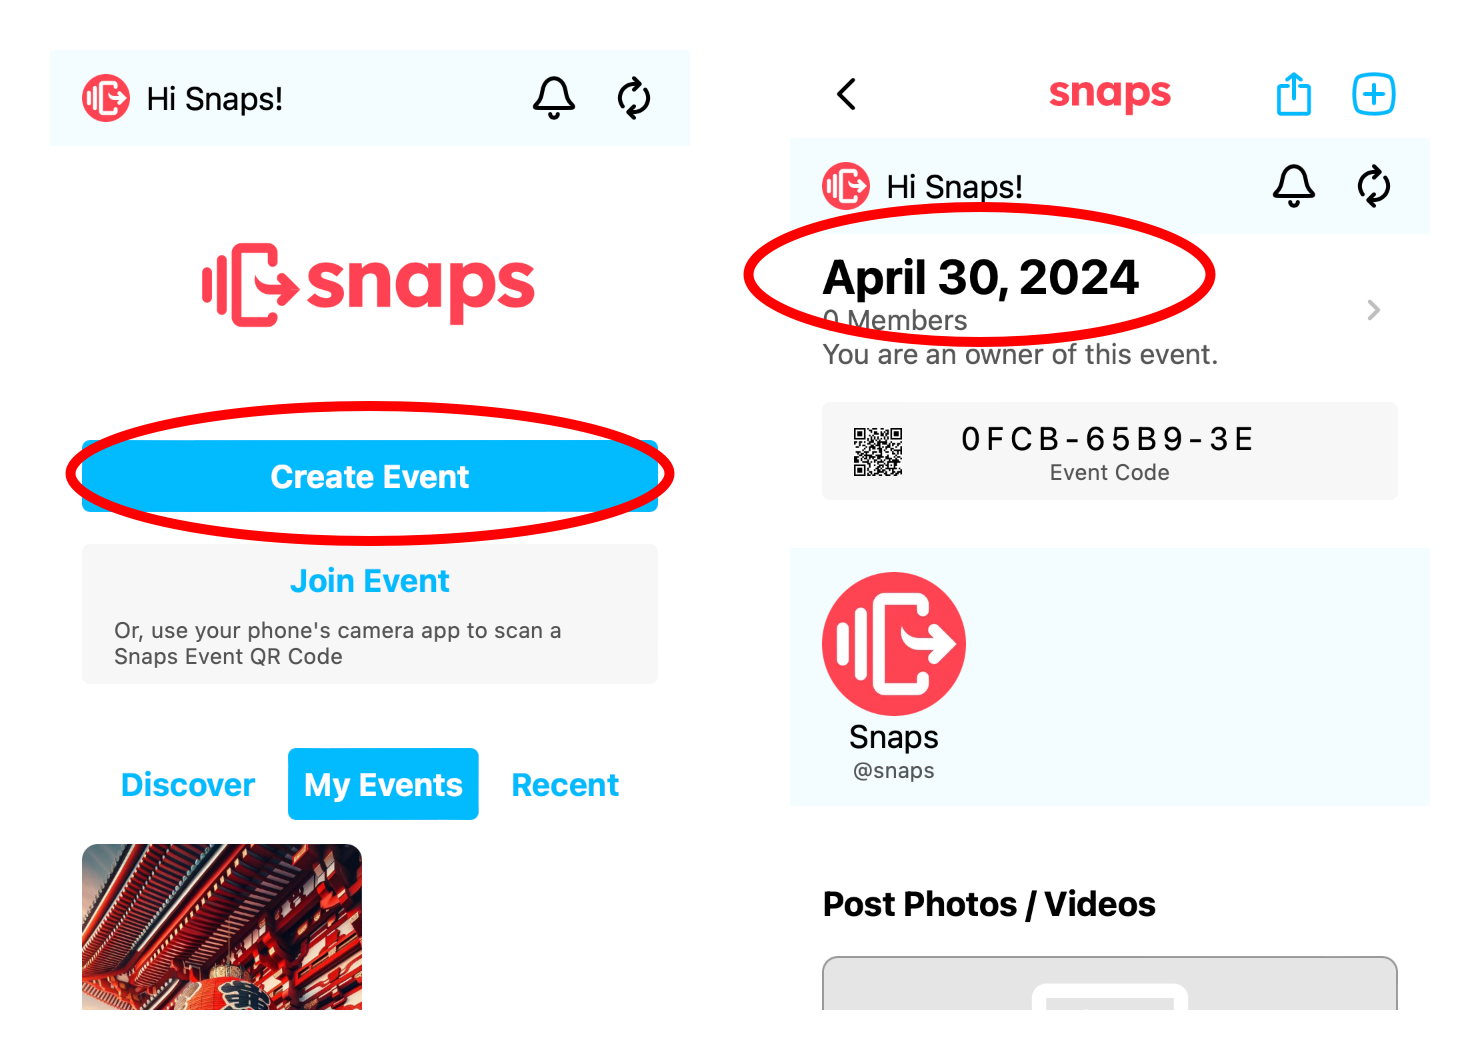
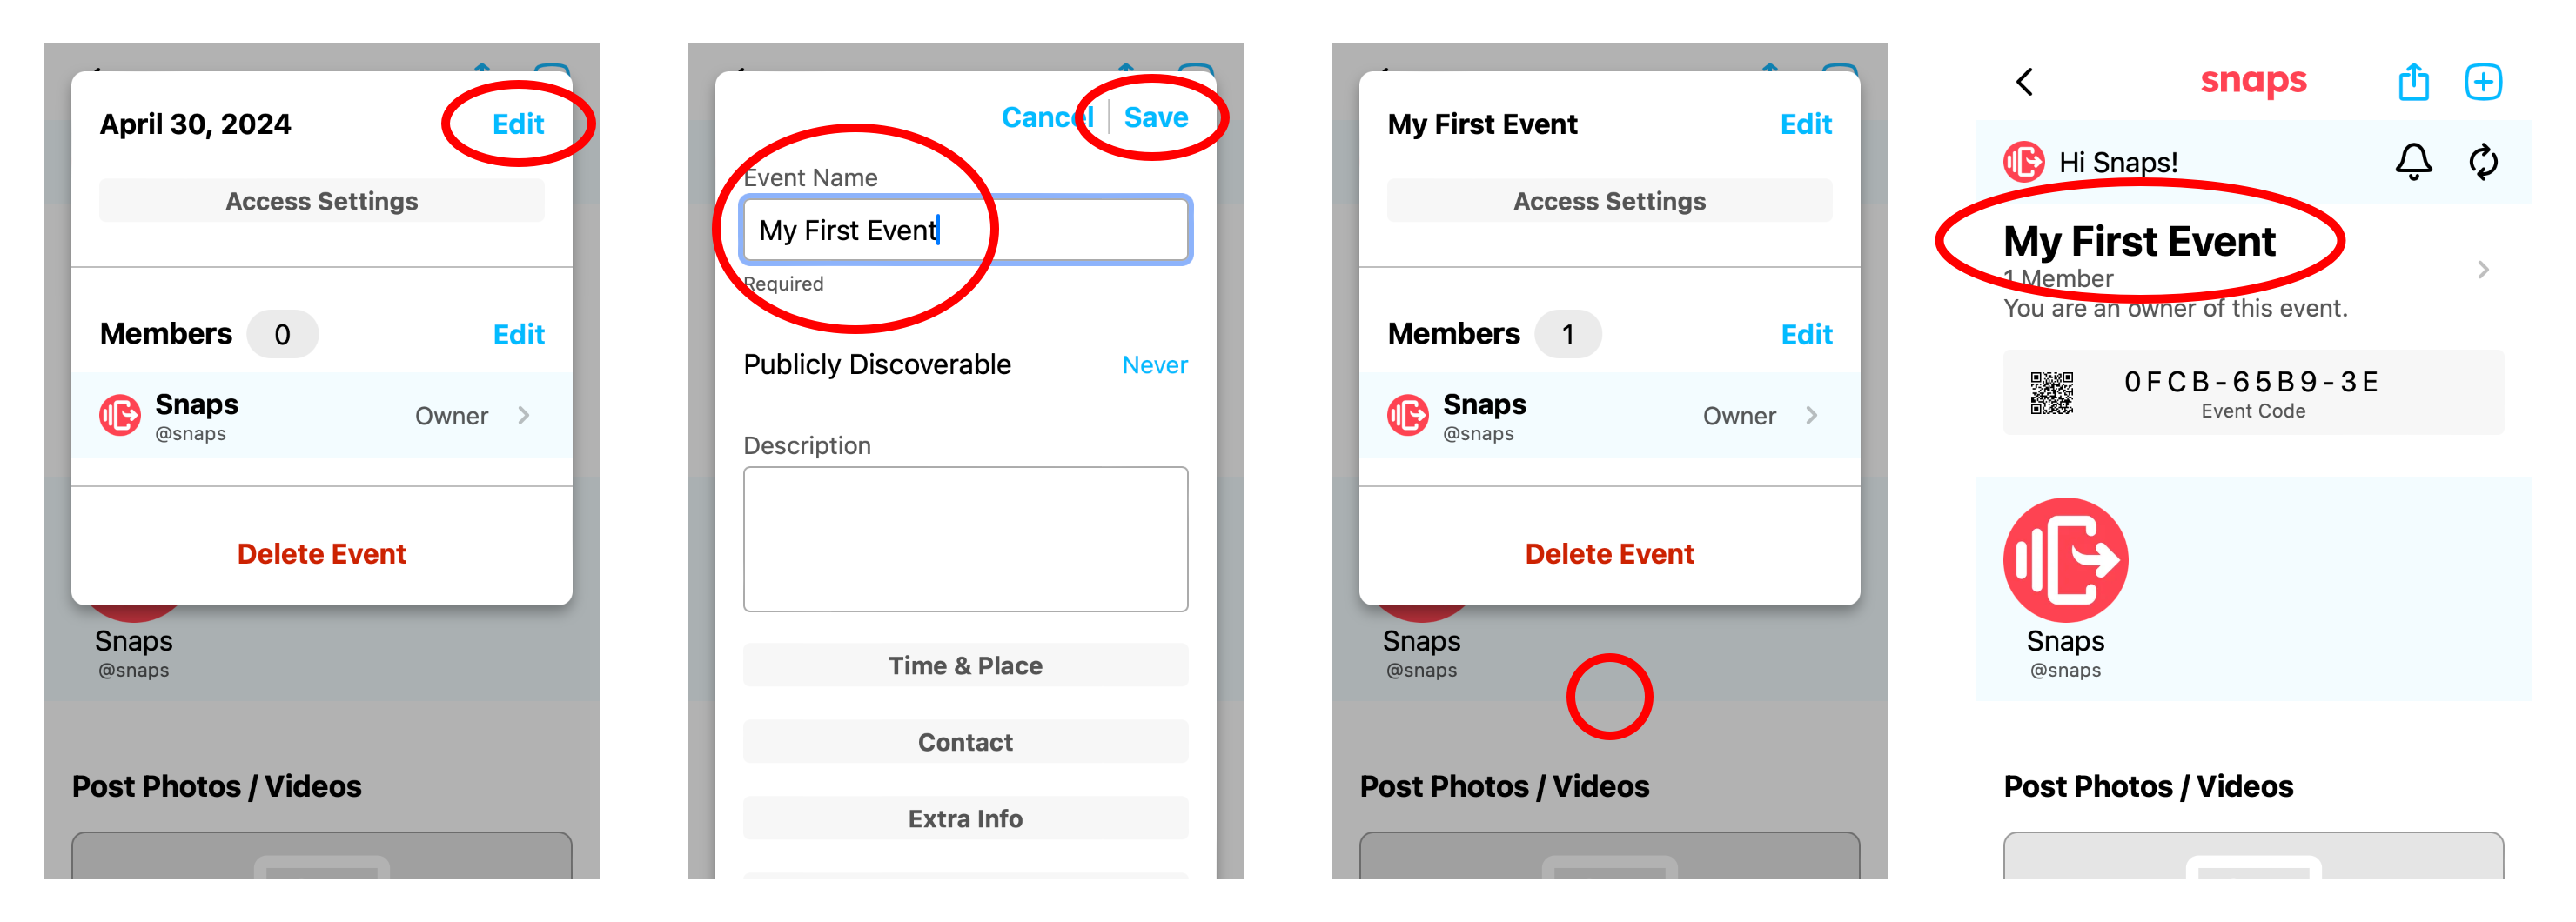
Now you have an event and can start customizing it. Find the event name at the top of the page, which will default to the date the event was created, and click that. Then, click "Edit" in the dialog that appears.
Start by editing the name of your event. You should go through all of the other options in the Event Details dialog as well, but the name is usually the most important thing to start with.
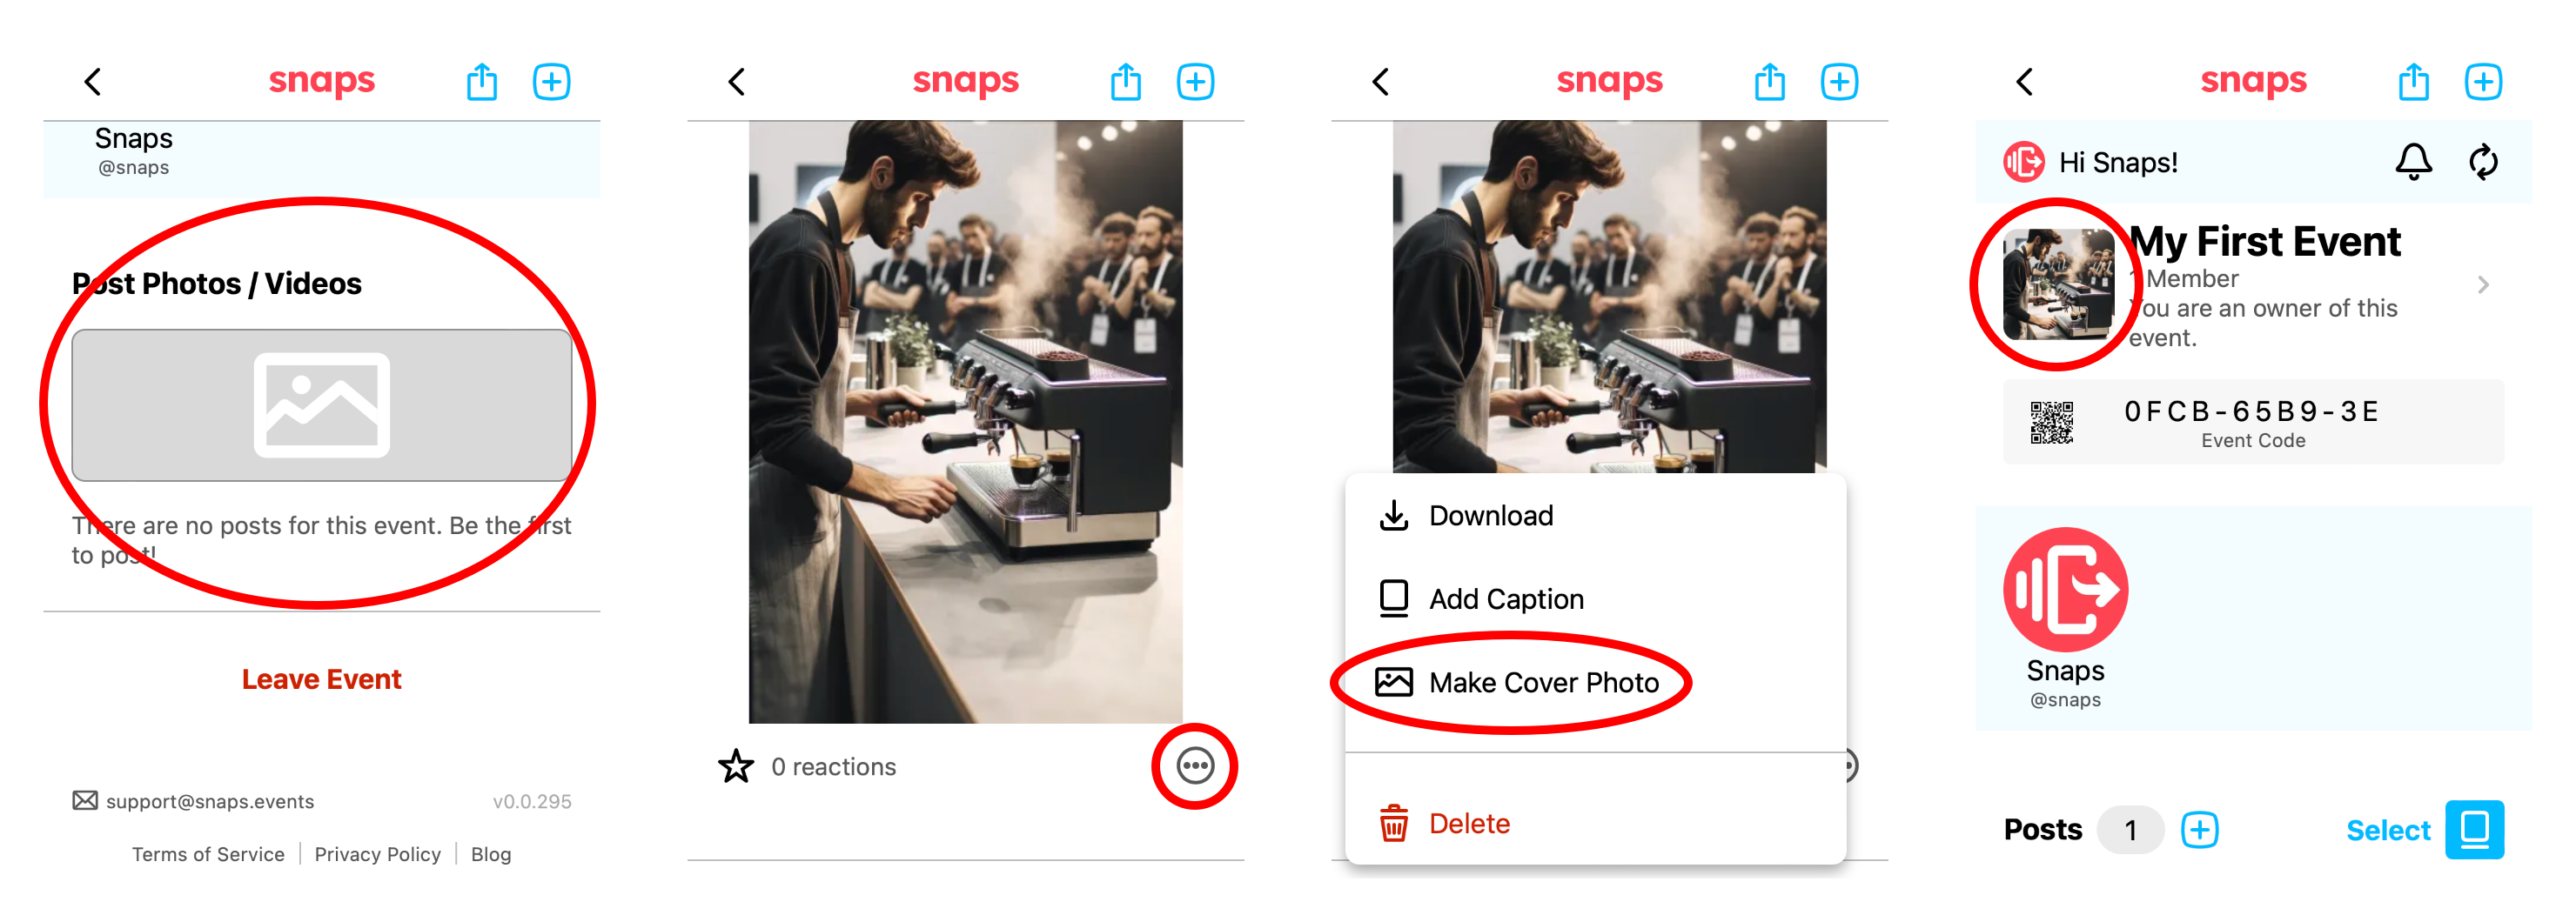
If you're going to promote your event, it helps to make at least one initial post -- and also to set a cover photo.
Once you're happy with the initial setup, go back into the Event Details dialog and add a description, links, and any other information and decide on the access and visibility settings that are appropriate for your event. You can change any of these settings at any time.
Sharing
You may choose to make your event publicly discoverable or you may choose to share it privately.
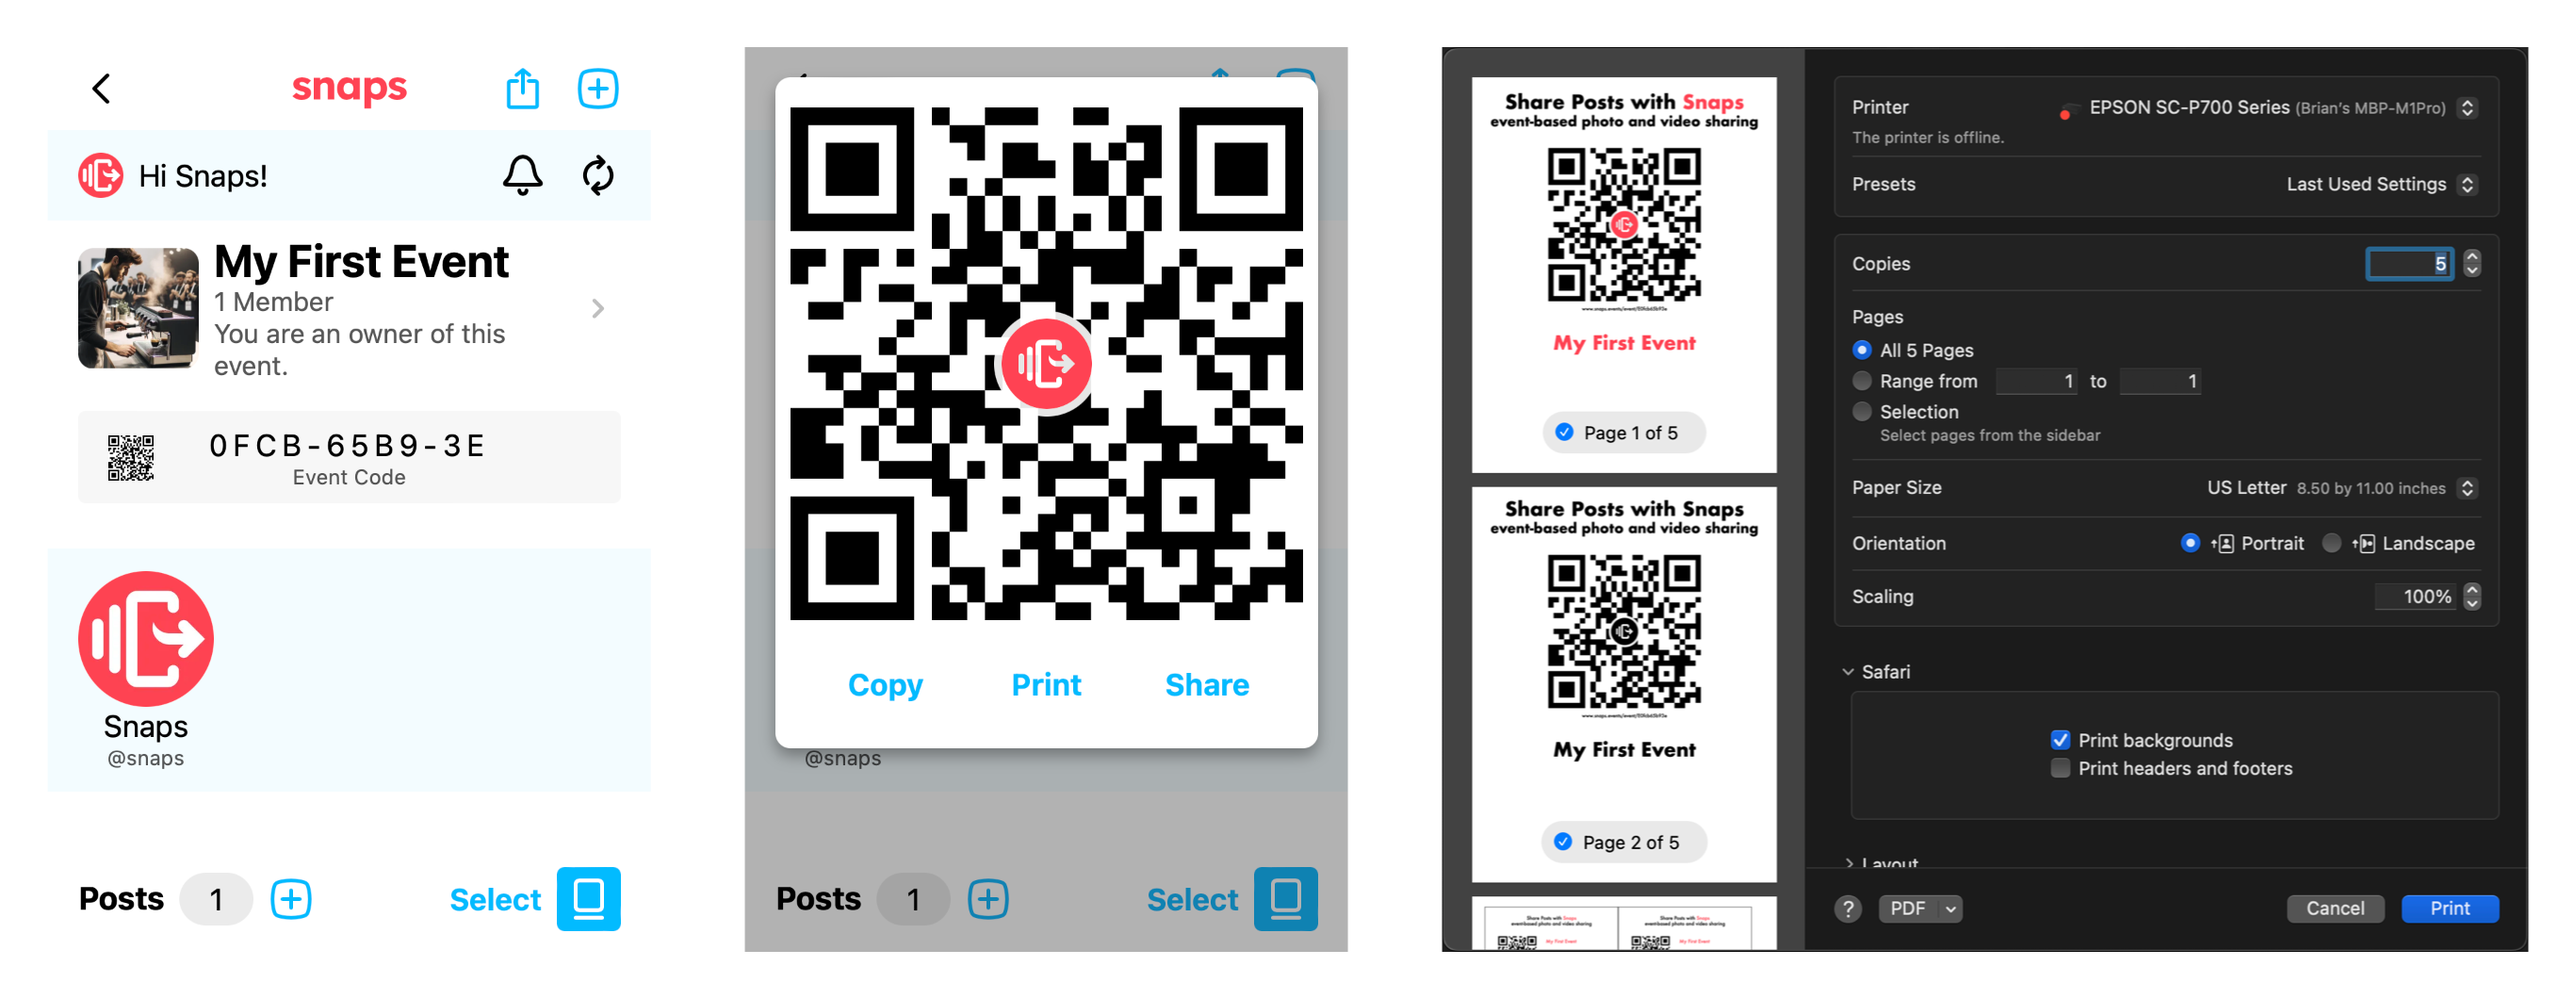
You can copy the event page URL, use the share button, or click the QR code icon, to share your Snaps Event.
People that want to view or post to your event can navigate to the URL or Snaps Event Code once you've shared it. If your event is publicly discoverable, they may also encounter your event on the Snaps home page or other pages.
The Snaps Event QR Code is also convenient. Use your phone's camera to scan the QR code, so you can avoid typing the event code.
Printing
In the QR Code dialog, there's a "print" button. We automatically produce several printing options including full sheet, business-card sized (approx.), and strips, in both color and black and white. Depending on your OS, printing options will differ, but you should be able to select which page numbers and number of copies to print, corresponding to your needs.